Introduction
Discover the rewarding experience of growing mushrooms at home with our comprehensive guide. From beginners to seasoned cultivators, learn everything from setting up your space to harvesting your own mushrooms.
Bare Necessities
- 12-Ct Sterilite 20-Qt Tubs
- Nitrile Gloves
- 70% Isopropyl Alcohol
- Measuring Spoons and Cups
- Ice Scoops
- Sieves
- Distilled Water
- Kitchen Scale (0.1g)
- Large Kitchen Scale (0.5g)
CVG Substrate Supplies
Long-Term Storage
Basics
Other companies might tell you that you need expensive equipment, prepackaged substrate and grow bags in order to cultivate your own mushrooms. Hobbyists may suggest that you need to stick to tried-and-true methods and small batches in order to succeed.
What those guys won’t tell you, is that you can utilize the spawn-to-bulk technique, which makes up for the lack of a completely sterile, lab-like environment by ensuring that you have enough starting material to make up for any losses you may suffer due to contamination.
You can also cut out the middleman by preparing grain spawn, liquid culture and substrate right in your kitchen. The startup cost is relatively low, and uses common items which can be found at retail outlets and online. You might already have some of these materials and tools without realizing it!
If you are ready to grow full flushes and start your own healing journey, continue reading below!
Don’t want to grow your own? Learn more about what we do.
Environment
An important step in growing beautiful, full canopies of mushrooms is making sure that your environment is relatively clean. While we don’t expect you to have a fume hood or air scrubbers, we do recommend bleaching your kitchen counter and stove, considering that loaf of bread has been sitting there turning green for the last few days.
Sanitize the environment you are working in using diluted bleach, isopropyl alcohol, or a disinfectant spray. Do not combine cleaners. Allow the area to dry before working. If the area is visibly dirty, as kitchens can tend to be, use warm water and dish soap to remove any solid matter or stains, and allow the area to thoroughly dry before sanitizing.
To further minimize the risk of contamination, your colonized substrate will not be directly exposed to open air all the time. Instead, we will use the “unmodified monotubs” method to allow only a small amount of room air to circulate over your mushrooms at any given time.
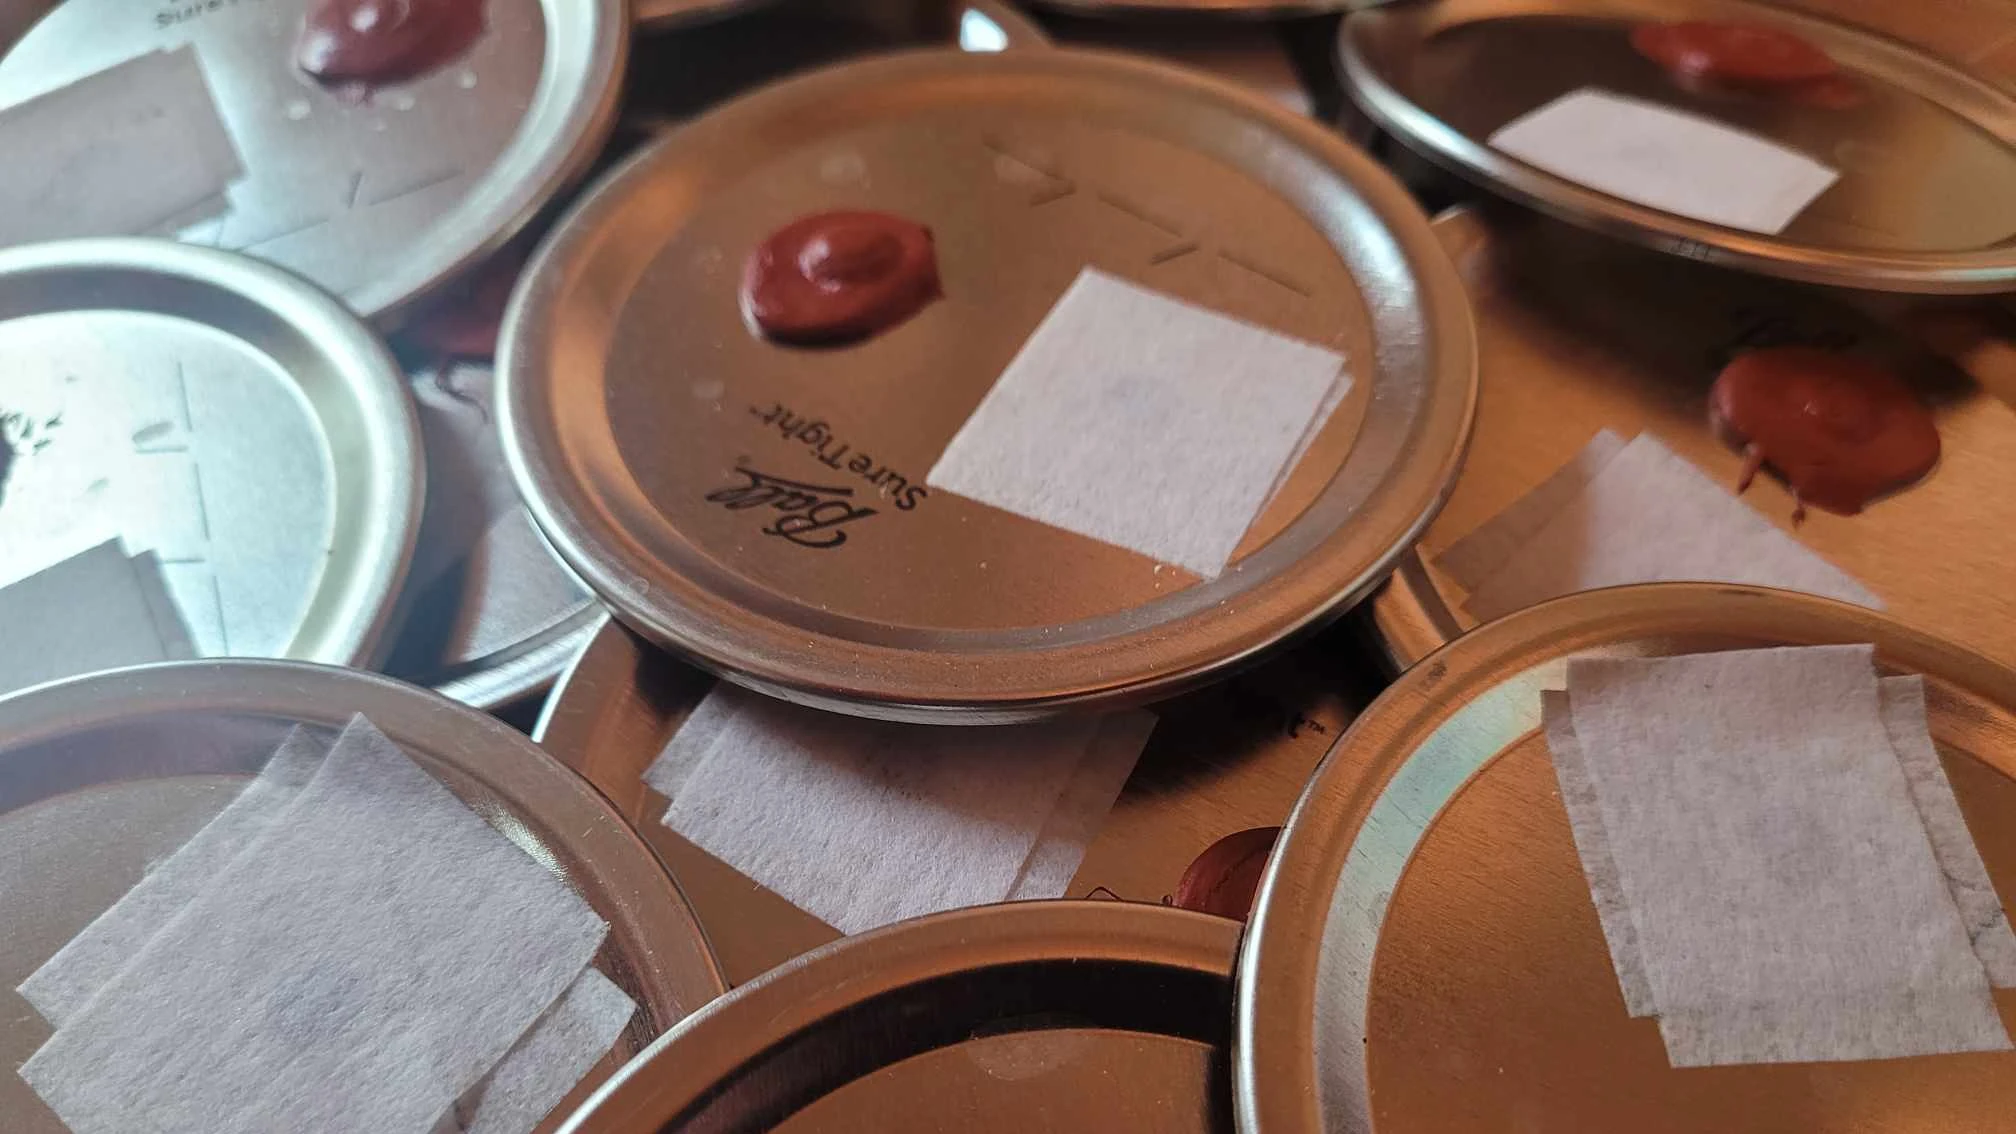
We will also use a gas exchange filter and self-healing injection port on our jar lids, in order to reduce the chance of contamination when inoculating or taking culture from a jar.
What Should I Grow In?
The “unmodified monotub” method makes use of regular 20-quart Sterilite latching tubs, available mostly everywhere in the United States. You can reuse these as long as there are no signs of contamination from the first to the last flush. These are kept latched as the substrate is colonized, and then the lids are left loosely on top to promote airflow when fruiting conditions are introduced.
The walls of the tubs should always be wet. You may need to spray the walls of the tubs with distilled water anywhere from 1 to 5 times a day once they are exposed to air, depending on your climate. Do not spray the lid, and avoid spraying the substrate or mycelium directly.
Where To Get Spores & Culture
At this time, Maine Magic Mushrooms is not a vendor of spores, liquid culture, or fruiting bodies for any variety of fungi. We recommend that you source your starting material from online vendors such as PNW Spore.
Please be advised that it is federally illegal in the United States, and illegal at the state level in Maine to cultivate or possess mushroom species which produce psilocybin.
Possessing spores of species like P. Cubensis for microscopy is legal, except in California, Georgia, and Idaho where it’s prohibited. Liquid culture for these species is prohibited by federal law, due to the presence of psilocybin.
You may learn more at PNW Spore – Is It Legal to Buy Mushroom Spores Online?
The guide below is applicable to the cultivation of many different varieties of mushrooms, including those which produce psilocybin. Please ensure you are following the local laws and regulations in your jurisdiction.
Glossary
- Mycelium: The vegetative part of a fungus, consisting of a network of fine white filaments (hyphae).
- Rhizomorphic: Describing mycelium that is root-like and rapidly expanding.
- Knots: Tiny white dots of bunched hyphae that appear on the substrate, which will become pins.
- Pins: The initial small mushrooms that emerge from the substrate.
- Flushes: Successive waves of mushrooms that grow from the substrate.
Grain Spawn Jars
Read First:
- How to Make Modified Lids
- WBS Instant Pot Grain Spawn Tek (Recommended for beginners!)
- or: White Millet Grain Spawn Tek
Inoculating the Jars with Spores or Culture
When choosing whether to inoculate your jars with spores or liquid culture, be advised that spore syringes are typically considered “dirty”, meaning they are contaminated with foreign bacterial endospores or fungi spores which may result in contamination of the spawn. Generally, liquid cultures are preferred for inoculating grain jars because they are isolated from clean, healthy specimens of the desired mushroom cultivar.
To inoculate a jar with liquid culture or spores, first wipe the injection port with 70% isopropyl alcohol and allow it to dry. You should also sterilize the needle on your liquid culture syringe before inoculating each jar, using the flame of a small torch.
Now, insert the needle into the injection port and inject about 1 cc of fluid while rotating the needle around to ensure even coverage. Repeat this process for as many jars as you wish to inoculate, sterilizing the needle and injection port each time, until you run out of liquid.
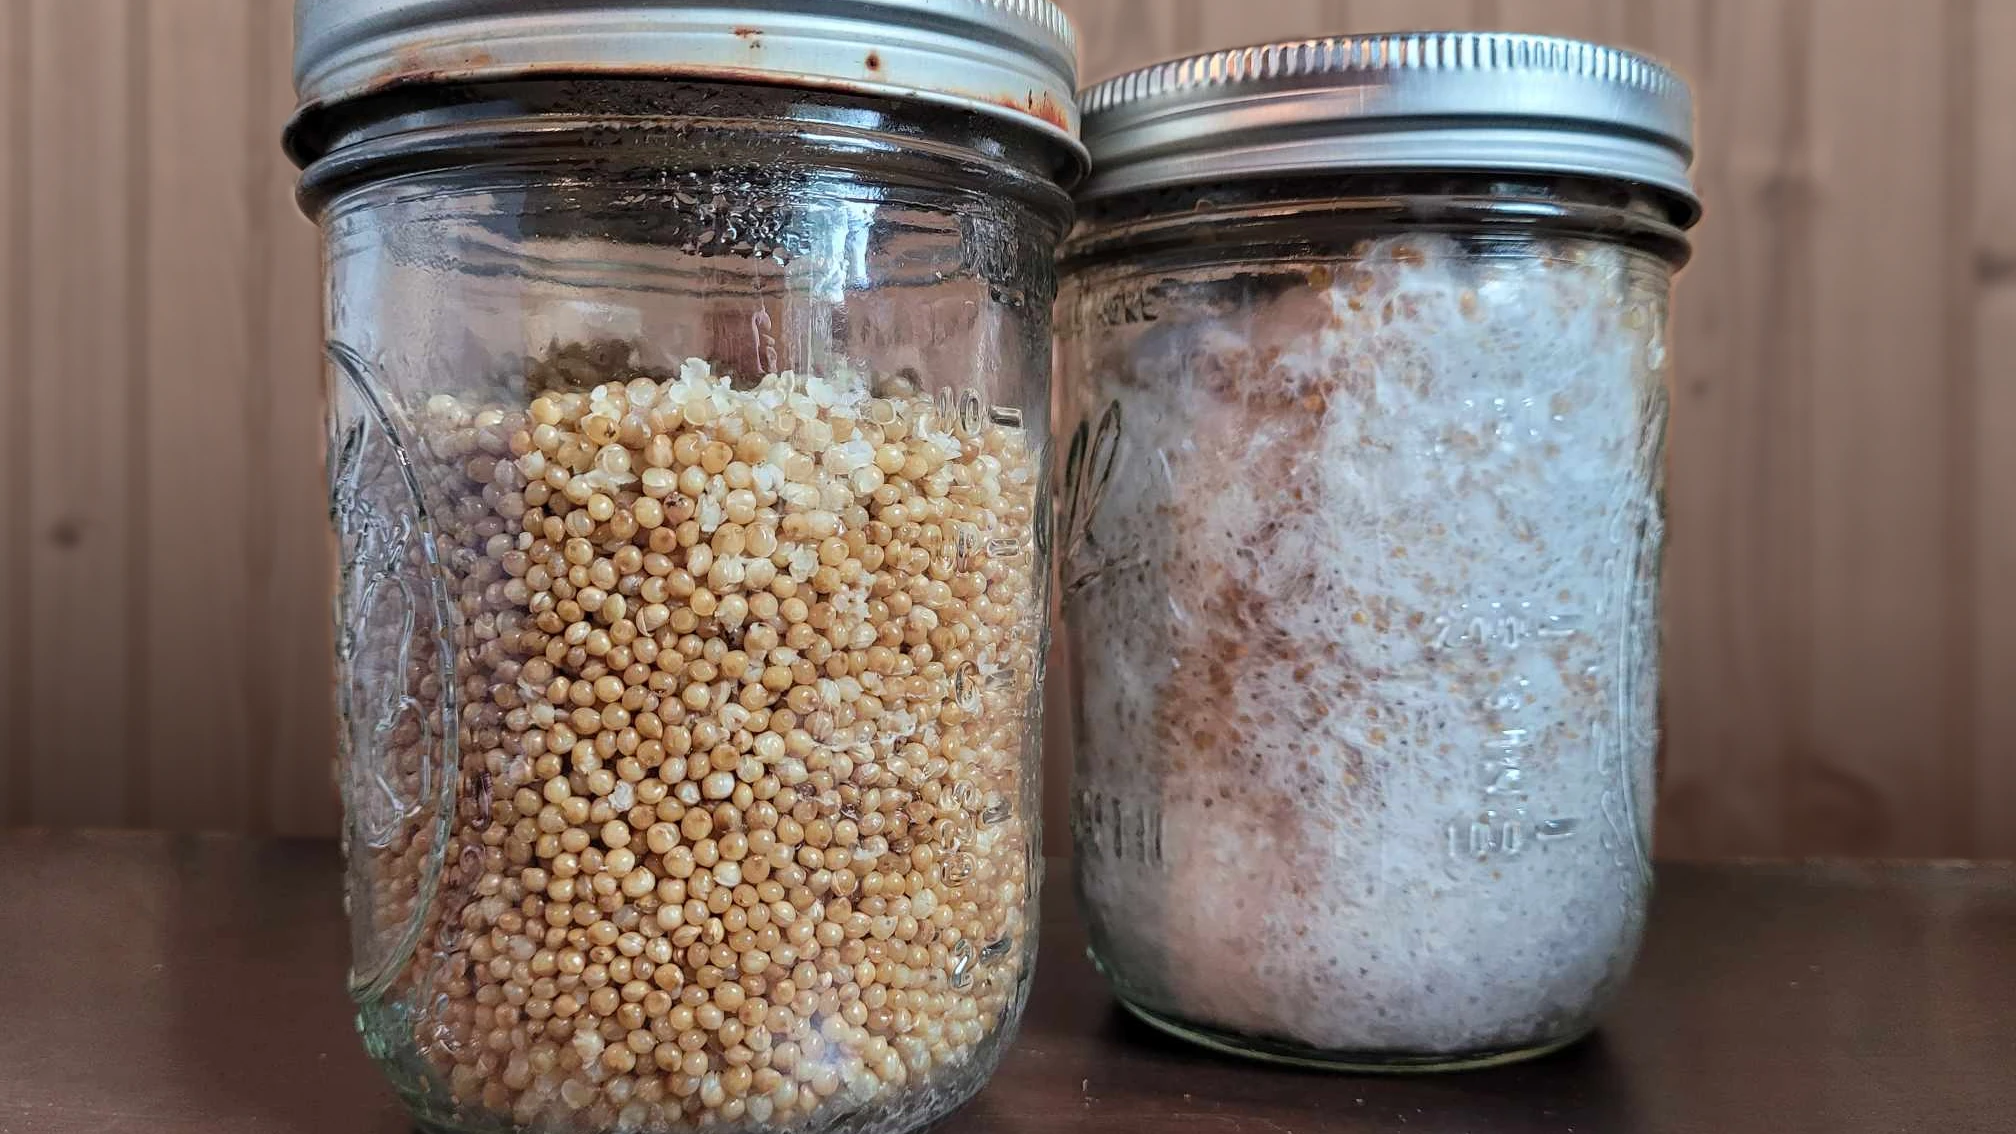
Spores may take over 30 days to show first signs of colonization, while liquid culture may start to show initial colonization after just a week or so. It’s important to leave the jars in a dark place, between 70-80 degrees Fahrenheit, to ensure that they colonize quickly and fully.
If any jars do not show full colonization 30 days after the first signs of mycelium growth, they should be discarded as they are likely contaminated with bacteria or fungi.
Avoid using any jars that display signs of colonization that are not consistent with healthy, white, fluffy, or rhizomorphic mycelium. Any presence of orange fluid, which indicates metabolites, or dark bluish-green bruising—common in active species—are consistent with stressed mycelium, which may also indicate contamination. Send these jars at your own risk.
If you are unsure, https://www.reddit.com/r/ContamFam/ is a great place to view photos of contaminated grain and substrate, as well as examples of healthy mycelium and fruiting bodies.
Healthy, fully colonized grain jars may be used to carry on the genetic line and create new liquid cultures. For more information on this process, you should read our How To Make Liquid Culture from Grain Spawn article.
Preparing CVG Substrate
- 8-Qt Stock Pot
- Powdered Gypsum
- Coco Bliss Coco Coir
- Bulk Vermiculite
- Five Gallon Buckets
- Stirring Stick
Preparing your own pasteurized substrate at home is an easy and inexpensive way to produce bulk quantities of high quality material, ready to mix with colonized grain and “sent to bulk”. This method takes less than an hour of working time.
Mix Dry Ingredients
In a five-gallon bucket, combine one 650g brick of coco coir, 650g of vermiculite, and 100g of gypsum. Do not stir or kick up any dust.
Boiling the Water
Bring 20 cups of distilled water to a rolling boil in a stock pot.
Combine Wet and Dry
Add the boiling water directly to the 5 gallon bucket and cover using the bucket lid. Periodically stir the mixture using a big wooden stick, like a tomato stake. Break up any large chunks of coir and make sure all the ingredients are evenly incorporated together. When the internal temperature is less than 75 degrees Fahrenheit, or is cool to the touch, it is ready to be combined with spawn. When a handful is squeezed, the substrate should release very little water.
Sending to Bulk
Once you have prepared healthy grain spawn and CVG substrate, you can now combine the substrate with the spawn, and add the mixture to the tubs. For each tub, 2 pint jars or 1 quart jar of substrate is plenty.
It is important that you sanitize the tubs before colonizing. You may use 70% isopropyl, diluted bleach, or disinfectant spray to clean the tubs and their lids. Make sure they are completely dry before adding any substrate or spawn. You should also keep your hands clean with soap and water, and you may opt to wear nitrile gloves as well as a face covering.
First, add 400 grams of substrate to the bottom of the tub. Spread it out evenly, and pack it down tight. Use the tips of your fingers to press the edges of the substrate layer tightly against the walls of the tub.
Then, add 200g of spawn (1 pint jar, or half a quart), and add an additional 200 grams of substrate. This should be roughly a 1:1 ratio. Break up the spawn and substrate so that the spawn is broken up into the smallest possible pieces. Again, pack it down tightly paying careful attention to the edges.
Now, add another 200g of spawn, breaking it up as thoroughly as possible, and spread it out evenly. This spawn layer should ensure an even pin set and a full canopy.
Finally, add a final layer of 400g of substrate. This is known as a pseudocasing and will provide additional moisture to your mycelium. You’ll want to pack this down the same way as the bottom layer: tightly, taking extra care with the edges.
Entering Fruiting Conditions
If your environment is humid, you should now expose the cake immediately to fresh air, entering fruiting conditions. Place the lid on the tub, upside down with the foam gasket facing up.
If you’re in a drier environment, place the lid on right-side up without latching. Remove the lid once each day and use it to fan the cake, before placing the lid back on without latching. You’ll need to do this each day.
The walls of the tubs should always be wet. After around day three, you should notice visible water droplets on the sides of the tub as the cake releases moisture. You may need to spray the walls of the tubs with distilled water anywhere from 1 to 5 times a day once they are exposed to air, depending on your climate. Do not spray the lid, and avoid spraying the substrate or mycelium directly.
Once the tub is introduced to fruiting conditions, the mycelium will slowly colonize the tub, and small knots will appear on the surface. Eventually these knots will begin to turn into “pins”, which will then grow into fruiting bodies, or mushrooms! This whole process will take place over a few weeks.
You should check the tubs each day for signs of contamination. If a tub appears to be contaminated, immediately bring it outdoors for disposal. Place it in a garbage bag on its own and put it into a waste receptacle. Do not open it indoors, or you risk contaminating your other tubs.
Harvesting Your Mushrooms
Most mushrooms are ready to be harvested either just before or just after the veil breaks (if present) and the cap opens fully, revealing the gills and dropping spores. Make sure your hands are clean before you harvest any mushrooms, to avoid contaminating the cake. You may also opt to wear gloves.
To harvest a mushroom, firmly grasp it at the base and twist to detach it from the cake. If excess substrate clings to the base of the mushroom, scrape it off with your thumbnail or trim it with scissors or a knife.
You can opt for either a ‘partial’ or a ‘total’ harvest. A partial harvest involves taking the largest, most developed mushrooms and leaving the smaller ones to grow. A total harvest means removing all fruiting bodies from the cake, and then scraping the cake with some implement, usually a fork, to encourage the knotting process to occur again. Both methods are fine and you should experiment and go with what you prefer. You can even choose on a tub-by-tub basis!
Soaking a Cake
After harvesting, a tub may begin to perform poorly and not produce as many fruits. You may also observe yellow, dry portions of the cake, as well as dark blue-green bruising which can easily be mistaken for mold or other contaminants. This is due to evaporation of water from the substrate, and limited nutrients remaining in the spawn.
Prior to a soak, perform a total harvest and scrape the cake. Then place a small weight, such as a clean concrete paver or a weightlifting plate, on top of the cake and soak it for 12 hours in distilled water. After 12 hours, drain the water and leave the lid ajar to allow excess water to evaporate. Start spraying the walls again when they appear dry.
Soaked cakes are more prone to contamination, so monitor them closely. You may soak a cake more than once, but it will become more susceptible to contamination each time, and eventually after many soaks it will fail to produce any more fruits and may start to decompose. You should discard it immediately if it reaches this stage.
Storing Your Harvest
Dry your mushrooms in a dehydrator until ‘cracker dry,’ where the stipes snap crisply like a cracker. They can then be stored in canning jars or vacuum bags with desiccant packets added to ensure freshness.
This dehydration method can be used on any varieties of mushrooms you wish to keep fresh for very long periods of time, up to many months and even years. Chanterelles, a wild variety native to Maine, dry well and add a savory flavor to soups and other dishes.
You can also store fresh, washed mushrooms in the refrigerator for a few days to a few weeks depending on the variety. You should always check out resources online on the specific cultivar you intend to grow and store.


